 If you’ve ever peeked behind your dryer or noticed a chilly draft sneaking in through the laundry room, you might be dealing with an outdated or broken dryer vent cover. I recently tackled this project myself, and let me tell you—it’s easier than you think, and the payoff is immediate. Not only does a sturdy, weatherproof vent cover keep the elements out, but it also helps keep critters at bay and your dryer running efficiently. Here’s how I swapped my old, leaky vent for a shiny new weatherproof one, step by step—a simple but essential dryer vent cover replacement.
Why Bother Upgrading Your Dryer Vent Cover?
You might wonder why you’d even bother replacing that plastic flap outside. Here’s what I learned: Over time, old covers get brittle, crack, or even fall off. When that happens, rain, snow, chilly winds, and even curious squirrels can find their way into your dryer vent. This isn’t just uncomfortable; it can lead to water damage, higher energy bills, or even a nest of unwelcome guests. A weatherproof cover seals out the weather, keeps your laundry area cozy, and helps your dryer vent properly—an upgrade that pays for itself in peace of mind.
Gathering Your Tools and Picking the Right Cover
Before jumping in, make sure you have the basics. I only needed a screwdriver, a small utility knife, and a ladder to reach the vent. For stubborn old covers, a pair of pliers and some exterior caulk help too.
When choosing a new vent cover, look for one labeled “weatherproof” or “all-season.” These are made to withstand everything from summer sun to icy winters. You can choose between metal and heavy-duty plastic. Metal lasts longer but might cost a bit more. Make sure the size matches your dryer vent opening—most homes use a 4-inch vent, but it never hurts to double-check.
| Type | Pros | Cons |
|---|---|---|
| Plastic Weatherproof Cover | Lightweight, easy to install, affordable | Can become brittle over time, less durable |
| Metal Weatherproof Cover | Very sturdy, long-lasting, resists animals | More expensive, may require painting to prevent rust |
| Hooded Design | Good wind and rain protection, keeps out pests | May collect lint, needs regular cleaning |
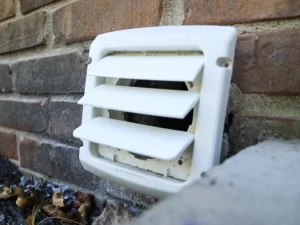
| Louvered Flap Design | Opens only when dryer is running, saves energy | Flaps can get stuck if not cleaned |
Out with the Old: Removing the Existing Cover
Removing the old vent cover was surprisingly simple. First, I unplugged the dryer just to be safe. Then I headed outside with my screwdriver and gently unscrewed the old cover. If there’s any old caulk or sealant around the edges, a utility knife makes quick work of it. Once the cover is off, check for any lint or debris in the vent opening and clear it out—this is a great chance for a quick cleaning, and your dryer will thank you!
Installing the New Weatherproof Cover
With the opening cleaned up, fitting the new cover is a breeze. I lined up the new cover over the vent hole, making sure the flaps or hood faced downward to keep rain out. Using the screws that came with the new cover (or reusing the old ones), I fixed it snugly against the wall. A bead of exterior caulk around the edges sealed it tight against the weather. Press firmly but don’t over-tighten—you don’t want to crack the cover or the siding.
The whole job took less than an hour, and the difference was immediate. No more cold drafts, no more rattling cover in the wind, and my dryer seemed to run more smoothly.
Final Checks and Tips
Once it’s installed, plug your dryer back in and run it for a few minutes. Step outside and make sure the vent flaps open easily when air blows through. If you used caulk, let it dry as directed on the package. If your new cover has a screen, remember to check it every few months for lint buildup—clogged covers can slow down your dryer and even be a fire risk.
I also recommend checking the vent cover every season. Look for cracks, animal damage, or any gaps that might let air or water sneak in. A little vigilance keeps your laundry room comfortable and your dryer running safely for years to come.
Weatherproof dryer vent covers are all about protection—look for covers with tight-sealing flaps, sturdy construction (metal or heavy-duty plastic), and a design that blocks animals and rain. Some models even have built-in screens to catch lint, but make sure they’re easy to clean.
Always unplug your dryer before starting this project. Wear gloves if you’re dealing with sharp metal or old caulk. And never block your vent with anything that could slow airflow—proper venting keeps your dryer safe from overheating and reduces fire risk.
A good weatherproof vent cover usually costs between $10 and $35, depending on the material and features. If you already have the basic tools, you won’t need to spend much more. This is one home fix that gives you a lot of value for a small investment.
If you notice a sudden drop in dryer performance, drafts, or visible damage to your vent, don’t wait—fixing the cover right away can prevent bigger issues. In rare cases, if you spot signs of animals or water coming into your home, call a pro for emergency help.
Wrapping Up
Replacing a tired old dryer vent cover with a brand new weatherproof one is one of those DIY tasks that’s totally doable, even if you’ve never tackled a home fix before. Not only will your laundry area feel more comfortable, but you’ll save on energy and keep out those pesky drafts and critters. All you need is a free afternoon, a few simple tools, and the motivation to make your home just a little bit better.
Read More: Bolingbrook Dryer Vent Cleaning