So, you’ve found the perfect design for your next embroidery project. It looks amazing on your computer screen. You load it onto your machine, hit start, and then… chaos. The stitches are a mess, the colors are wrong, and your machine is making sounds you’ve never heard before. What went wrong? Chances are, the issue lies with the file format. Your embroidery machine speaks a specific language, and if you’re not speaking it back, you get gibberish. This is where learning to Convert to DST File becomes your superpower. It’s the key that unlocks professional, reliable results from any design.
This guide will walk you through everything you need to know, from the absolute basics to the pro-level tips that will make your DST conversion process smooth and error-free.
What Exactly is a DST File, and Why Does It Matter?
Before we dive into the “how,” let’s understand the “what” and the “why.” A DST file is not a picture. You can’t open it in Photoshop and see your design. Instead, think of it as a set of precise, step-by-step instructions written in a language your embroidery machine understands.
DST stands for “Data Stitch Tajima,” named after the Tajima brand of embroidery machines that popularized it. Over time, it became the industry standard, a universal language that almost every commercial and home embroidery machine can read.
Here’s why the DST format is so crucial:
-
It’s a Command Center: The file contains coordinates that tell the machine exactly where to move the needle for every single stitch. It dictates the stitch type (running, satin, fill), the order of colors, trims, and even jumps between different sections of the design.
-
It’s Reliable: Because it’s a standardized format, you can send a DST file to almost any machine in the world and expect it to run correctly (provided the design itself is well-digitized).
-
It’s Compact: DST files are efficient. They don’t contain high-resolution image data, just the essential commands, making them small and easy to transfer.
If your machine expects a DST file and you feed it a JPEG or a PNG, it’s like trying to play a DVD in a cassette player. It just won’t work.
The Conversion Toolkit: What You Need to Get Started
You can’t convert a file with magic; you need the right software. The tool you choose often depends on your commitment level and budget.
1. Dedicated Digitizing Software (The Pro Route)
This is the gold standard. Programs like Wilcom EmbroideryStudio, Hatch Embroidery, or Pulse Ambassador are built specifically for this task. They don’t just convert files; they allow you to create and edit embroidery designs from scratch—a process known as digitizing.
-
Pros: Total control, powerful editing tools, ability to fix errors, and highest quality output.
-
Cons: Expensive and has a steep learning curve.
2. Auto-Digitizing Software (The Middle Ground)
Software like Sierra’s AutoPunch or the auto-features in Hatch and Wilcom fall into this category. You import a image file (like a PNG), and the software attempts to automatically convert it into an embroidery file.
-
Pros: Much faster and easier than manual digitizing. Great for simple designs with clear lines.
-
Cons: Results can be unpredictable. The software often creates inefficient stitch paths, uses too many stitches, and fails with complex artwork. It’s a starting point, not a finish line.
3. Online File Converters (The Quick & Easy Route)
A quick web search will reveal dozens of websites that promise to convert your JPG to DST in seconds.
-
Pros: Inexpensive (often free), incredibly easy to use, no software to install.
-
Cons: This is the most risky option. You have zero quality control, no ability to edit, and the resulting file may be unusable. Use these only for the simplest of designs and always, always test-stitch the result on a scrap piece of fabric first.
Your Step-by-Step Guide to a Flawless Conversion
Let’s walk through a typical conversion process using dedicated software, which gives you the best chance of success.
Step 1: Start with a High-Quality Image
Garbage in, garbage out. The quality of your final DST file is directly tied to the quality of your source image. Look for images with:
-
Clear, sharp edges.
-
Minimal detail.
-
High contrast between the design and the background.
Simple logos and clipart work best. A detailed photograph of a sunset will almost never convert well.
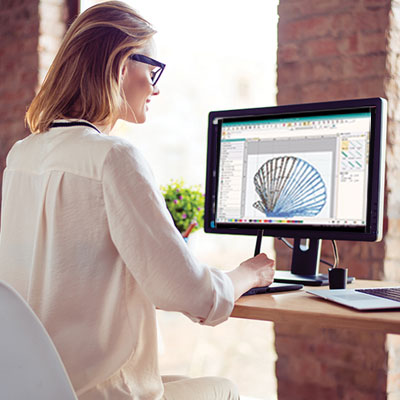
Step 2: Import and Set Parameters
Open your digitizing software and import your image file. Before the software does anything, you need to tell it the rules. This includes:
-
Design Size: Specify the exact dimensions you want the final embroidery to be.
-
Fabric Type: Is this for a sturdy denim jacket or a stretchy t-shirt? The fabric choice can affect pull compensation settings.
-
Stitch Type: For different parts of the design, you will assign stitch types. Outline a letter with a Satin Stitch, and fill a large area with a Fill or Tatami stitch.
Step 3: The “Auto-Digitize” Function (And Its Limits)
Go ahead, click the auto-digitize button. See what happens. For a very simple design, it might do an okay job. But you will likely see issues immediately: jagged curves, illogical stitch sequences, or unnecessary trims. This is where the real work begins.
Step 4: The Pro Move – Manual Editing and Refining
This is what separates beginners from pros. You will dive into the digitized design and clean it up.
-
Edit Stitch Points: Manually adjust the points that define the shape of your object to smooth out curves.
-
Optimize the Stitch Path: Rearrange the order of elements to minimize jumps and trims. A logical path means less thread breaks and a cleaner back of the design.
-
Adjust Stitch Density and Underlay: Add an underlay stitch to stabilize the fabric and adjust the density of the top stitches so they aren’t too sparse or too dense.
Step 5: Save As and Test Stitch
Once you are happy with the design, you save or “export” it as a DST file. But you’re not done yet! The most critical step for any professional is the test stitch. Hoop a piece of similar fabric and run the design. Watch for thread breaks, puckering, or gaps in the stitching. Take notes, go back into the software, tweak the problem areas, and test again. Repeat until it’s perfect.
Common Conversion Pitfalls and How to Avoid Them
Even with the best software, things can go wrong. Here are common issues and their fixes:
-
Puckering Fabric: The stitches are too dense, or you lack proper stabilizer. Reduce the stitch density in your software and always use the correct stabilizer for your fabric.
-
Gaps in Fills: The pull compensation is too low. Increase this setting slightly so that the fill stitches overlap the underlying outlines.
-
Jagged Lines: The original image was low-resolution, or the digitizing software used too few stitch points. Manually add and smooth the points along the curve.
-
Excessive Trims/Jumps: The stitch path is inefficient. Reorder the objects in your design so the machine embroiders all areas of one color before moving to the next, minimizing long jumps.
Conclusion: Your Journey to DST Mastery
Mastering DST file conversion is less about a single click and more about embracing a new skillset. It’s the bridge between a cool idea and a flawlessly stitched reality. Start by understanding the language of your machine, invest in the best software your budget allows, and never underestimate the power of a test stitch.
The journey from beginner to pro is paved with practice. Start with simple designs, learn the tools of your software inside and out, and don’t be afraid to make mistakes—each one teaches you something new. Soon, you won’t just be converting files; you’ll be creating durable, beautiful embroidery with the confidence of a true professional. Now go forth and stitch something amazing