Installing EPDM properly is one of those jobs that looks deceptively simple until you’re halfway through it. I’ve installed EPDM on garages, garden rooms, extensions, and even a small commercial flat roof, and every project taught me something new. When done right, EPDM rubber roofing is tough, forgiving, and lasts decades. When done wrong, it becomes an expensive lesson.
This guide is written from hands-on experience, not theory. I’ll walk you through installing EPDM, share what usually goes wrong, and explain how professionals actually approach rubber flat roof installation on real job sites.
Why EPDM Is a Go-To Flat Roofing Material
EPDM rubber roofing installation has grown massively over the last decade. I first used it after tearing off a failed felt roof that lasted just seven years. The EPDM roof I replaced it with is still watertight today.
EPDM is flexible, UV-resistant, and doesn’t crack like older materials. Once installed, it barely moves. That stability is why installing rubber roof systems is now common for both DIYers and contractors.
Another big plus is simplicity. Compared to GRP or torch-on felt, epdm install work involves fewer tools and no flames, which instantly lowers risk.
Preparing the Roof Surface (Don’t Skip This)
Before installing EPDM rubber roofing, the roof deck must be flawless. I mean clean, dry, and solid. Any shortcut here will show up later as bubbles or weak seams.
Most of my epdm roofing installation details problems early on came from poor prep. Old nails left proud, dusty OSB boards, or damp timber will all cause adhesion issues.
Use 18mm OSB3 or exterior-grade plywood. Screw it down properly. Sweep it. Then sweep it again. This step alone determines 80% of success when fitting EPDM roof systems.
Measuring and Positioning the EPDM Sheet
Always dry-lay the membrane before gluing. When installing EPDM, I roll it out and let it relax for at least 30 minutes. Cold EPDM shrinks slightly, and skipping this step can pull edges loose later.
Measure twice. Cut once. That’s not a cliché here. EPDM is forgiving, but precision makes installing EPDM rubber roofing far cleaner and stress-free.
I leave at least 75mm extra on all sides. That overlap saves you if the sheet shifts slightly during bonding.
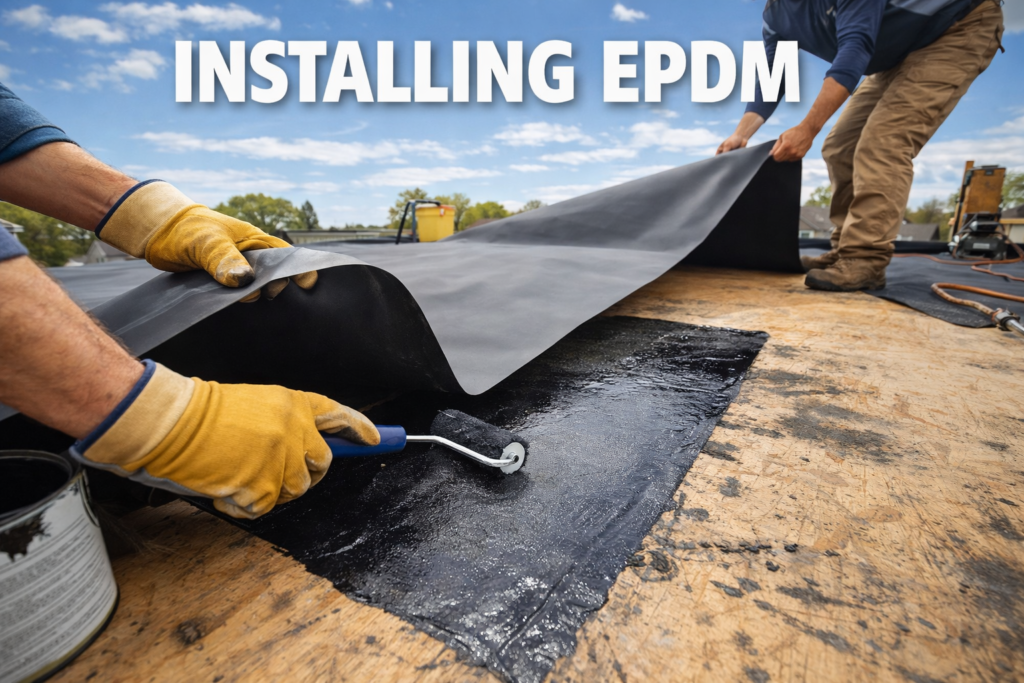
Applying Adhesive the Right Way
This is where most DIY installs fail. Applying EPDM rubber roofing adhesive isn’t about flooding the roof with glue. It’s about even coverage.
Fold half the membrane back. Apply water-based adhesive to the deck using a roller. Do not rush. Let it go tacky.
Lay the membrane down slowly, working from the center outward. I always use a soft broom. It pushes air out gently and avoids stretching.
Repeat for the other half. This method has never failed me on any epdm rubber roofing installation project.
Detailing Edges and Corners Like a Pro
Corners separate amateurs from experienced installers. When fitting EPDM roof edges, patience matters more than strength.
Use pre-formed corners if possible. When hand-cutting, avoid sharp folds. EPDM hates stress points.
I learned this after a winter job where an incorrectly folded corner lifted under frost. Since then, I treat corners like gold during installing EPDM work.
Bond edge trims only after the membrane has fully settled. Rushing here leads to visible ripples.
Installing Outlets and Penetrations
Every penetration is a potential leak. On my first rubber flat roof installation, I underestimated this. Never again.
Use EPDM pipe boots and compatible sealant. Cut small. Stretch gently. Seal generously but neatly.
Whether it’s a vent, drain, or cable entry, careful detailing defines a successful installing EPDM rubber roofing job.
Firestone EPDM Rubber Roofing Installation Insights
I’ve installed several Firestone systems, and there’s a reason professionals trust them. Firestone EPDM rubber roofing installation kits are consistent and predictable.
The membrane quality is excellent, and seam tapes bond reliably. On larger roofs, that reliability saves hours.
If budget allows, Firestone is a solid choice, especially for long-term durability in commercial installing rubber roof projects.
Common Mistakes I See All the Time
Rushing is mistake number one. EPDM rewards calm, methodical work.
Second is over-stretching the membrane. EPDM should relax, not be forced.
Third is ignoring weather. Installing EPDM in damp or freezing conditions causes adhesion failure. I always check forecasts before starting any epdm install.
Maintenance After Installation
One of the reasons I recommend EPDM is low maintenance. Once installed, inspection twice a year is enough.
Clear debris. Check edges. Look at penetrations. That’s it.
A properly executed how to fit EPDM roof approach means fewer repairs and zero surprises.
Final Thoughts From the Roof
After years of installing EPDM, I still appreciate how forgiving it is. It doesn’t demand perfection, but it rewards care.
Whether you’re tackling your first installing EPDM rubber roofing project or refining professional skills, focus on preparation, patience, and detail.