The art of Free-Standing Lace (FSL) is mesmerizing. You create delicate, intricate objects made entirely of thread, with no fabric backing. The results—ornaments, jewelry, and decorative lace—look impossibly fragile yet are surprisingly durable when made correctly. The entire secret to this magic doesn’t lie in the hoop, but in the digital instructions you create beforehand. Successfully learning how to Digitize FSL File for Embroidery is a unique and precise craft. This step-by-step guide will walk you through the specialized process of creating a digital file that builds strong, beautiful lace from the ground up.
Introduction: Why FSL Digitizing is Architecture, Not Art
Imagine building a bridge out of toothpicks and glue. You wouldn’t just stack them randomly; you’d design a structure where every piece supports another, with strategic cross-bracing for strength. Standard embroidery is like painting on a sturdy canvas—the fabric provides the support. FSL embroidery is like building that toothpick bridge. The thread is the structure.
Therefore, digitizing for FSL is an exercise in structural engineering. Your primary concerns shift from color blending and fabric puckering to connectivity, density, and tensile strength. A standard digitizing approach will create a floppy, collapsed mess when the water-soluble stabilizer washes away. The FSL method creates a self-supporting thread sculpture. This guide focuses on that critical engineering mindset.
Step 1: Design with Connection in Mind
Before you open any software, you must plan a design that can stand alone.
-
Choose or Sketch an “FSL-Friendly” Design: Good FSL designs resemble ironwork, snowflakes, filigree, or interconnected geometric patterns. Every element must touch another. Isolated islands, floating dots, or disconnected curls will simply fall out when the stabilizer dissolves.
-
The Golden Rule: If you can’t trace the entire design with a pen without lifting it from the paper, it’s not connected enough. You must add “bridges” or “tie-in” bars to link all parts into a single, unified network.
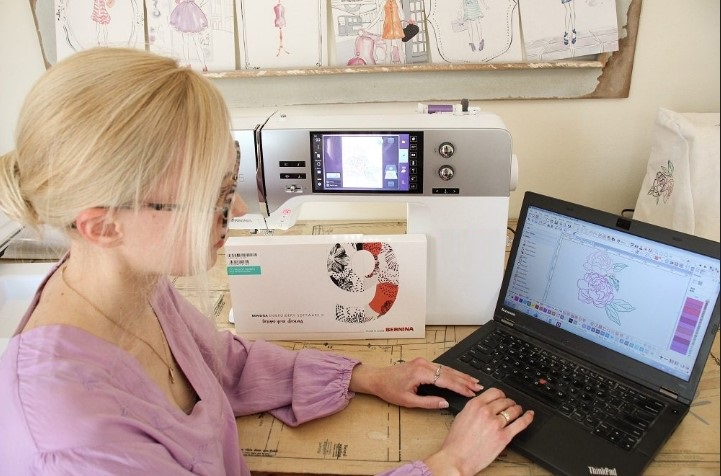
Step 2: Set Up Your Digitizing Software
Use software capable of manual digitizing with control over stitch parameters. Wilcom Hatch, Embrilliance StitchArtist, or Brother PE-Design are excellent choices.
-
Create a New Project: Set your hoop size. For FSL, you’re not limited by fabric, but by your machine’s maximum stitch area.
-
Disable Fabric Settings: If your software has a “fabric” or “backing” setting, ignore it. You are stitching on stabilizer.
-
Select Satin Stitch as Your Primary Tool: This will be your main “building material.” Set your default satin stitch width between 2.0mm and 4.5mm to start. Wider columns are stronger but use more thread.
Step 3: Trace Your Design with Satin Columns
This is where you build the blueprints for your thread structure.
-
Manual Drawing: Using the software’s drawing tools (like the Bezier curve tool), trace the lines of your connected design. Create closed shapes for solid areas and open paths for linear elements.
-
Apply Satin Stitch Properties: Assign every drawn line or shape a Satin Stitch fill. For curved elements, ensure the software’s “stitch angle” is set to follow the curve, keeping the stitches perpendicular to the path. This makes the column strong and smooth.
-
Check for Gaps: Zoom in closely. The satin columns must touch or slightly overlap at their junctions. A gap is a weak point.
Step 4: The Most Critical Step: Engineering the Underlay
In FSL, underlay isn’t just stabilizer—it’s the rebar inside your concrete. It’s what gives the top satin stitches something to grip onto and prevents them from pulling apart into loose threads.
-
Select Every Satin Column: One by one, open the stitch properties for each object.
-
Access Underlay Settings: Find the underlay menu. The standard “edge walk” underlay used in normal embroidery is often insufficient here.
-
Apply a Strong Underlay: Choose a Grid or Contour underlay type. You want a tight, mesh-like foundation. A common and effective method is a double underlay: first a center walk run stitch down the middle of the column, then a zig-zag that goes edge-to-edge. This creates a locked-in net for the top stitches.
-
Set High Underlay Density: Don’t be shy. The underlay density should be higher than your top stitch density. You want a tight, firm foundation. The underlay stitches will be completely covered by the top satin stitches, so don’t worry about them being visible.
Step 5: Adjust Stitch Parameters for Strength
Fine-tune your materials for maximum durability.
-
Stitch Density (Within the Satin Column): This controls how tightly packed the top stitches are. Too low, and the underlay shows through, creating a weak, gappy column. Too high, and the thread can bunch or even cut through the stabilizer. A moderate density (around 0.4mm stitch length within the column) is a good starting point.
-
Pull Compensation: Use minimal pull compensation. Since there’s no fabric to pull, you don’t need to compensate for fabric distortion as much. Too much pull compensation can cause the satin stitches to bloat and lose shape.
-
Tie-Off Stitches: Ensure your software adds ample tie-in and tie-off stitches at the start and end of each column. Since there’s no fabric on the back to anchor the thread, these tiny, locked stitches are crucial for preventing unraveling. Increase the number of tie-off stitches in the settings.
Step 6: Plan the Stitch Sequence for Continuity
Every trim is a potential weak point where thread ends can loosen.
-
View the Sequence Map: Look at your software’s object sewing order.
-
Minimize Trims: Arrange the sequence so the needle travels from one connected section to the next via a jump stitch (a long stitch the machine will later cut away) instead of trimming the thread. Only trim when absolutely necessary, like when you’ve finished a completely detached section (which you shouldn’t have in FSL!) or must change color.
-
Sew Logical Paths: The machine should follow a logical path through the design, like drawing it in one continuous line if possible.
Step 7: The Physical Test – From Digital to Durable Lace
Your digital file is a theory. The wash-away test is the final exam.
-
Hoop the Stabilizer: Use 2-3 layers of heavy-duty water-soluble stabilizer (like Sulky Ultra Solvy or Vilene). Hoop it drum tight. The stabilizer is your entire “fabric.”
-
Stitch the Design: Use a sharp needle (75/11) and good quality polyester or rayon thread. Stitch the entire design.
-
The Dissolving Process: Carefully cut away excess stabilizer from around the stitched design. Submerge it in a bowl of lukewarm water. Gently swish it. Be patient—it can take several minutes for the stabilizer to fully dissolve. Do not rush by using hot water or scrubbing, as this can distort the delicate thread.
-
Drying and Shaping: Place the wet lace flat on a paper towel or a foam blocking board. Gently shape it with your fingers. You can pin it into place to dry if needed. Let it air dry completely.
Step 8: Analyze and Iterate
Once dry, you have your first prototype. Analyze it with a critical eye:
-
Does it hold its shape without drooping? If it’s floppy, you need wider satin columns, a tighter underlay, or higher top stitch density.
-
Did any connections break? The satin columns at that junction may not have overlapped enough, or the underlay was insufficient.
-
Is it stiff and board-like? You might have overdone the density. Slightly reduce top stitch density.
Go back to your software, adjust the specific parameters, and create a new version of your file. Stitch and test again. This cycle is essential for perfecting FSL designs.
Conclusion: Mastering the Craft of Thread Engineering
Learning how to Digitize FSL File for Embroidery is a rewarding journey into a specialized niche of the craft. It teaches you to think in three dimensions and understand the structural properties of thread. By focusing on connectivity, engineering a robust underlay foundation, and committing to the test-and-refine cycle, you move from creating fragile thread sketches to crafting durable lace art.
This step-by-step process empowers you to turn intricate designs into stunning, self-supporting realities. The satisfaction of watching the stabilizer dissolve away to reveal a perfect, strong piece of lace you built from a digital blueprint is unmatched. Now, start with a simple shape, follow these steps, and unlock the magical world of free-standing lace.