Introduction to the Bali Pass Trek
Where is Bali Pass Located?
The Garhwal region of Uttarakhand, India, is home to the high-altitude mountain pass known as the Bali Pass. Sitting at around 16,200 feet, it connects the Har Ki Dun valley to the Yamunotri valley—two regions that are stunning on their own but feel like discovering secret chapters of the Himalayas when linked together through this trek. If you’ve never heard of Bali Pass before, you’re not alone. It’s not your average popular route filled with crowds. This trail stays tucked away from mass tourism, which is exactly what makes it so thrilling.
I recall wondering, “How did I never know about this place?” as I looked at the map.” The trail starts from Sankri, a base village famous for treks like Kedarkantha, but Bali Pass takes you much deeper into the wild. It’s raw, dramatic, and at times downright surreal. Think glacier crossings, ancient temples, alpine meadows, and ridge walks that stretch your imagination and endurance.
The Reasons Bali Pass Is a Secret Treasure in the Himalayas
You know those places that feel untouched, where nature takes center stage? That’s Bali Pass. Unlike some treks where you bump into more people than pine trees, this one lets you be alone with the mountains. No honking jeeps, no overpriced cafes—just pure Himalayan solitude.
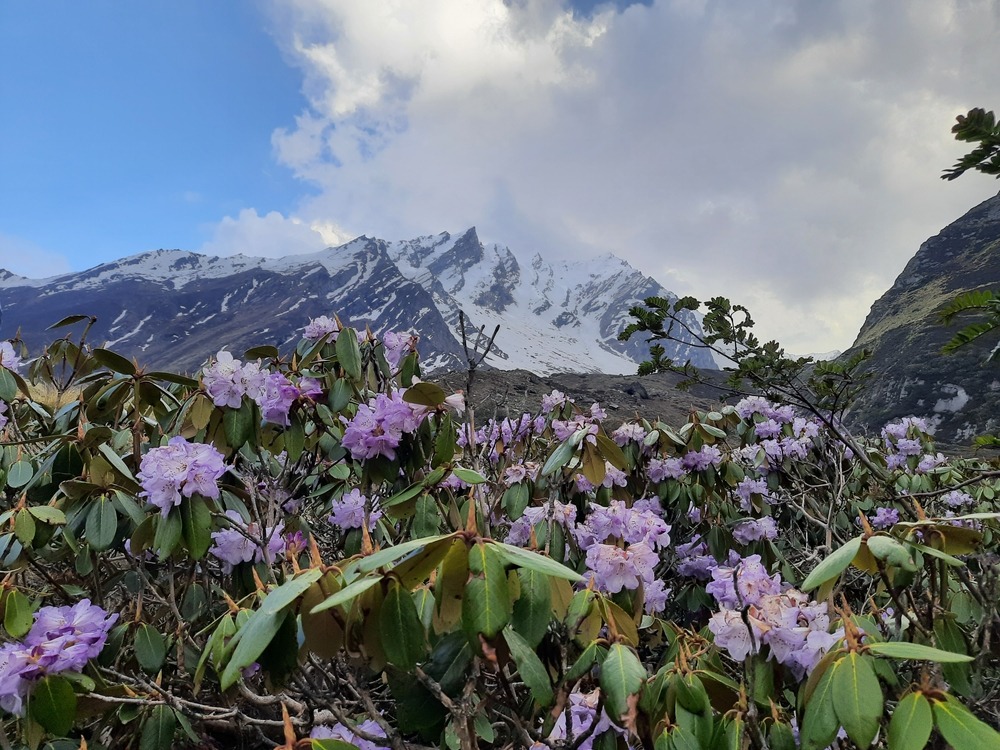
What makes this trek truly special is how it shifts in personality. The trail takes you through forests blooming with rhododendrons in spring, across roaring rivers, and eventually above the tree line into glacier and snow-covered territory. One moment you’re in a fairy-tale forest, and the next, you’re walking across a snowfield with nothing but mountain silence.
If you’re the kind of person who seeks adventure without compromise—where every step feels earned and every view feels like a reward—Bali Pass delivers. It’s one of those experiences that stick with you long after the journey is over.
Is Bali Pass Trek Right for You?
Required Fitness Level
Let’s be honest—Bali Pass isn’t a walk in the park. If you’re looking for a beginner-friendly trek, this probably isn’t it. You’ll be trekking at high altitude, climbing steep sections, and dealing with rough terrain. That said, you don’t have to be a marathon runner either. If you’ve done moderate treks before, like Hampta Pass or Kedarkantha, and you’ve kept your fitness in check, you’re good to go.
Here’s what helped me: stair training, cardio three times a week, and strength exercises for legs and core. A few weekend hikes before the big one also helped get my stamina up. The key isn’t perfection—it’s consistency. Trust me, being a little fitter makes the entire experience way more enjoyable.
And don’t underestimate the power of mental endurance. On my journey, there were times when I wanted to give up, particularly close to the summit. But the views, the silence, and the sense of being this close to something epic pulled me through.
Best Time to Go
Timing can make or break this trek. The ideal seasons are late May to mid-June and then again from late September to mid-October. During these windows, you get the clearest skies, manageable temperatures, and safe trail conditions.
In May and June, the trail still has snow near the pass, which makes the experience feel more alpine and adventurous. In autumn, post-monsoon, the colors pop like a dream. There is nothing like the stunning mountain views, pure air, and golden valleys.
Avoid monsoon season (July to mid-September)—the trail becomes slippery and prone to landslides. And winters? They shut it down entirely due to extreme snow.
Choosing the Right Guided Trekking Company
What to Look for in a Trekking Company
Booking a guided trek for balipass trek isn’t just about convenience—it’s about safety. The route involves glacier crossings, high-altitude camps, and rapidly changing weather. You want a team that knows the terrain like the back of their hand.
When choosing a trekking company, I use the following checklist:
-
Certified and experienced local guides
-
Safety equipment like oxygen cylinders and first aid
-
Proper acclimatization schedule
-
Transparent pricing with no hidden costs
-
Small group sizes (big crowds ruin the vibe)
Do your homework. Read reviews, compare itineraries, and most importantly, trust your gut. If something feels too rushed or vague, it probably is.
My Experience with One of the Best – Subtle Mention
I went with a group organized by a highly seasoned team based in Uttarakhand. I won’t shout their name from the rooftops, but if you search for guided treks starting from Sankri that include expert-led high-altitude expeditions, you’ll probably find them. What I loved most was their understated professionalism—no flashy promises, just rock-solid delivery.
Our guide had done Bali Pass over a dozen times and could read the weather like a mountain whisperer. From hot tea served before sunrise to motivating us through the last climb—these small touches made a huge difference. It didn’t feel like a transaction; it felt like we were all in it together.
How to Book a Guided Trek for Bali Pass
Booking Process Step-by-Step
Booking the trek isn’t complicated, but a few steps will make your life easier:
-
Pick your dates based on your availability and season.
-
Reach out to the trekking company—email, call, or use their website form.
-
Ask for the full itinerary, inclusions, and group size info.
-
Confirm your slot by making a partial payment (most companies require 30–50% upfront).
-
Get the gear checklist and fitness guidelines once you’re booked.
-
Start prepping—mentally and physically!
The majority of businesses will send you a pre-departure packet that contains all the necessary information. Read it as if your summit depends on it—because it sort of does. Don’t disregard it.
What Documents You’ll Need
There’s no fancy paperwork, but here’s what you should keep handy:
-
A valid government-issued ID (Aadhar, Passport, etc.)
-
Medical certificate stating you’re fit for high-altitude trekking
-
Disclaimer/indemnity form (usually provided by the trekking company)
If you’re a foreign national, you might need a Protected Area Permit depending on the latest local rules. It is best to consult your guide in advance.
What to Expect from a Guided Trek
Detailed Itinerary Overview
When you sign up for a guided trek to Bali Pass, one of the biggest perks is having your entire itinerary handled. Everything is planned to the last detail—from your arrival at the base village to your descent after crossing the pass. Let me break it down in a way that actually helps you visualize each day.
Most itineraries follow a 7 to 9-day schedule. Here’s a common format:
-
Day 1: Arrival at Sankri (6,400 ft) – This charming mountain village is your starting point. You will check your equipment and meet your guides and fellow trekkers. Usually, there’s a quick acclimatization walk in the evening.
-
Day 2: Drive to Taluka and Trek to Seema (8,200 ft) – After a short jeep ride to Taluka, the real walk begins. You’ll follow the Supin River, walking through dense forests and quaint wooden bridges.
-
Day 3: Seema to Rainbasera (10,200 ft) – The trail gets steeper, and you’ll feel the altitude kicking in. Rainbasera is a quiet campsite with epic views and chilly nights.
-
Day 4: Rainbasera to Ruinsara Tal (11,800 ft) – This is one of my favorite parts of the trek. The alpine lake is stunning, and the surrounding peaks mirror off the surface like something out of a dream.
-
Day 5: Acclimatization at Ruinsara – No rush today. You’ll take short hikes, do breathing exercises, and soak in the environment to help your body adjust.
-
Day 6: Ruinsara to Odari (13,100 ft) – This distance seems farther away. You start seeing snow patches, and the temperature drops noticeably.
-
Day 7: The most challenging and rewarding day is the one that leads from Odari to the 16,200-foot Bali Pass Summit and down to Lower Dhamni. You’ll start before sunrise, crampons on, layers up, and slowly ascend to the pass. Reaching the summit is like standing on the edge of the sky. The descent is steep but scenic.
-
Day 8: Lower Dhamni to Janki Chatti and Drive to Sankri – You descend to Yamunotri over wooded paths on the last stretch. A vehicle will drive you back to Sankri.
Each day, your guide gives a briefing, checks health status, and preps the group for what’s next. That structure makes everything smoother and more manageable.
What’s Included (and What’s Not)
Knowing exactly what’s covered can save you a lot of guesswork (and avoid unexpected costs). What is usually covered in a guided trek is as follows:
Included:
-
Accommodation in tents and guesthouses
-
All meals from Sankri to Sankri
-
Guides, porters, and support staff
-
Transport from Sankri to Taluka and return
-
Sleeping bags, mats, and tents
-
First aid and oxygen backup
Not Included:
-
Travel to and from Sankri (the typical connecting city is Dehradun)
-
Personal gear like trekking shoes, jackets, or walking sticks
-
Snacks, bottled water, or personal expenses
-
Tips for guides (optional but appreciated)
Guided companies often provide rental gear, so if you’re not a regular trekker, no need to buy everything. Just ask what’s available.
Safety and Support During the Trek
This is where a guided trek really shines. You’ve got trained professionals watching out for you every step of the way. They have emergency medicine, oxygen cylinders, and pulse oximeters with them. There are regular health check-ins to spot any symptoms of Acute Mountain Sickness (AMS).
And they don’t just look after your physical health. The psychological comfort of knowing someone’s got your back in such remote terrain? Priceless.
I remember feeling dizzy during the climb to Odari. Our guide made me stop, drink electrolytes, and rest while monitoring my oxygen level. If I’d been alone, I probably would’ve pushed through—and paid for it later.
Preparing for the Bali Pass Trek
Packing List Essentials
Forget overpacking. Every extra kilo in your backpack will feel like a burden at 14,000 feet. Here’s a basic but solid checklist that served me well:
Clothing:
-
3 quick-dry t-shirts
-
2 pairs of trekking pants
-
1 fleece jacket
-
1 padded down jacket
-
Waterproof and windproof shell
-
Thermals (top and bottom)
-
3 pairs of trekking socks (wool-blend)
-
Woolen gloves + waterproof gloves
-
Buff or neck gaiter
-
Woolen cap and sun hat
Gear:
-
Good trekking shoes with ankle support
-
Flip flops or camp shoes
-
Sunglasses with UV protection
-
60L backpack with rain cover
-
Daypack (20L) for summit day
Other Essentials:
-
Headlamp with extra batteries
-
Reusable water bottle (and purification tablets)
-
Sunscreen SPF 50+
-
Lip balm with SPF
-
Personal medication
-
Toilet paper and biodegradable soap
-
Microfibre towel
Optional but Useful:
-
Trekking poles
-
Energy bars/nuts
-
Camera or GoPro
-
Power bank
Stick to lightweight, high-performance materials. Avoid cotton—it takes forever to dry.
Acclimatization Tips
Acclimatization is the difference between enjoying the trek and having to quit midway. Here’s what worked for me:
-
Drink at least 3 liters of water every day.
-
Avoid alcohol and caffeine before and during the trek.
-
Climb high, sleep low—don’t rush to higher camps without breaks.
-
Listen to your body. Headaches, nausea, dizziness? Tell your guide immediately.
Take acclimatization seriously. It’s not a macho thing to “push through.” It’s smarter to rest than to risk.
What the Trek Feels Like Day-by-Day
Scenery and Trail Conditions
Each day on the Bali Pass trek feels like stepping into a new world. One of the things that hit me the hardest—aside from the thin air—was just how varied the landscape is. You start in dense forests where sunlight filters through pine trees, and by the time you reach the summit, you’re walking across snowfields with nothing but the crunch of ice under your boots.
In the early sections of the trail, the path winds along the Supin River, surrounded by thick oak and deodar forests. The trail is muddy in some stretches, especially after a recent rain, and it’s always good to have your gaiters on. As you climb higher, it transforms into open meadows, where the air smells fresher and the skies get bluer.
Then comes the alpine terrain—boulder sections, scree slopes, and finally snow. The final ascent to the pass is steep and slow. Expect to be using your hands at times. Weather changes rapidly here. One moment it’s sunny, the next, you’re walking through a snow flurry.
What’s amazing is how the scenery keeps you going. There were times I was out of breath but looked up and forgot I was even tired. The colors, the silence, and the vastness—everything feels like it belongs to a different planet.
Challenges and How to Tackle Them
Let’s not sugarcoat it—this trek will test you. Whether it’s the altitude, the cold, or the exhaustion, challenges are part of the deal. But knowing what’s coming can help you prepare and push through.
Challenge #1: Altitude
-
You’ll feel the effects above 10,000 feet. Breathlessness, exhaustion, and headaches are frequent. Hydrate religiously and take Diamox if prescribed.
Challenge #2: Long Walking Hours
-
Expect to trek 6–9 hours some days. Break it into mental checkpoints. “I used to tell myself, “Just move on to the next rock.” It works.
Challenge #3: Steep Ascents & Descents
-
The climb to the pass is no joke. Take it slow, use trekking poles, and follow your guide’s pace. Descents can hurt your knees—wear proper shoes and don’t rush.
Challenge #4: Cold Nights
-
Nights can drop to -5°C or lower. Layer smartly. A good sleeping bag (rated for sub-zero) is your best friend.
Challenge #5: Mental Fatigue
-
There were moments I questioned why I even came. But then, I’d turn around and see the view… and remember exactly why.
The key? Stay present. Don’t look too far ahead. Just pay attention to the step you’re taking.
Food and Accommodation on the Trail
What Meals Are Like
You won’t find fancy menus on this trek, but you’ll be surprised how satisfying the meals are—especially after a long day of hiking. Most guided treks include full meals cooked by the support staff at each campsite. To be honest, I eagerly anticipated each one.
Breakfast: Usually starts with hot tea or coffee, followed by porridge, paratha, or toast with jam. Sometimes there’s boiled eggs or poha (a light Indian breakfast dish).
Lunch: Packed lunches on the trail—like pulao, roti with sabzi, or sandwiches. Some days you’ll have a hot lunch at camp, especially on acclimatization days.
Snacks: Biscuits, energy bars, and soups in the evening. That hot soup hits different when you’re freezing outside.
Dinner: This is where they go all out—dal, rice, mixed vegetables, sometimes pasta or maggi, and always a warm dessert. Don’t be surprised if someone brings out a bowl of kheer (Indian rice pudding).
Meals are vegetarian, nutritious, and easy to digest—just what your body needs at high altitudes. And yes, you’ll miss them once you’re back to your city routine.
Sleeping Arrangements in Camps
You’ll be camping most of the way. Tents are usually shared between two people, and they’re sturdy, weatherproof, and surprisingly cozy when zipped up. Each tent comes with insulated mats and sleeping bags rated for cold weather.
At lower altitudes, campsites are set up in meadows or near rivers, with forest cover around. As you gain height, you’ll sleep in more exposed areas, where the wind howls at night and you might even hear ice cracking nearby. It sounds scary, but with a good team and quality gear, you sleep like a baby.
Toilets are dry pits or portable tents placed a little away from the main campsite. They’re basic but clean, and honestly, you get used to them. Toilet paper, hand sanitiser, and wet wipes are necessities.
Sleeping at 12,000+ feet is something else. You’ll hear the wind, the flap of the tent, maybe even the occasional snowflake hitting your roof. It’s all a part of the enchantment, though.
Cultural Experience Along the Way
Villages and Locals You’ll Meet
The trek isn’t just about mountains—it’s about the people, too. Along the way, especially near Sankri and Taluka, you’ll pass through small villages that seem frozen in time. Stone houses, wooden balconies, kids playing with hand-carved toys—these moments add a warmth to the cold that no fleece jacket can.
I remember a tea stall run by an old lady in Osla village. Her chai was the best I’ve ever had. We didn’t speak the same language, but smiles, nods, and warm cups said enough. Villagers here are welcoming but reserved. They’re used to trekkers but not tourists, which makes the interaction more authentic.
Local Customs and Etiquette
Here’s where you need to be mindful. These are sacred lands for many locals. One of the four holy pilgrimage destinations known as the Char Dhams is Yamunotri, which is reached at the end of the journey. Dress modestly, ask before taking photos, and avoid loud behavior.
Basic etiquette goes a long way:
-
Greet locals with a smile or “Namaste.”
-
Don’t litter—carry your waste until you find a bin.
-
Don’t enter homes or temples without invitation.
-
Support local stalls and shops—it keeps the economy alive.
Remember, you’re a guest here. Treat their home the way you’d want someone to treat yours.
Dos and Don’ts for Trekking the Bali Pass
Respecting Nature and Culture
This trek takes you through some of the most untouched natural and cultural landscapes in the Indian Himalayas, and it’s up to us as trekkers to preserve that. Respect is the golden rule here—not just for the trails but for the traditions of the people who call this region home.
Do:
-
Follow the “leave no trace” principle. Whatever you bring in, pack it out. Trash doesn’t belong in the mountains.
-
Stick to marked trails. Going off-route damages fragile ecosystems.
-
Be quiet in villages and temples. These places are not photo ops—they’re someone’s home or sacred space.
Don’t:
-
Don’t carve names into rocks or trees. Nature is not your personal guestbook.
-
Don’t wear flashy or revealing clothes in villages.
-
Don’t hand out candy or money to local kids—it changes the dynamic and isn’t sustainable.
Nature rewards those who walk gently. You’ll find a deeper connection with the landscape when you respect it.
Trekking Etiquette for Groups
If you’re trekking with a group, which you likely will on a guided trek, a little courtesy goes a long way. Remember, everyone’s on their own journey—some faster, some slower. It’s not a race.
Be supportive: A few kind words can lift someone who’s struggling up a steep climb.
Stay with the group: Don’t go too far ahead or lag behind. Your guide is trained to manage the group’s pace for a reason.
Noise control: Don’t blast music or talk loudly, especially in the early morning. Let the mountains speak.
Rotate tent duties: Some companies have shared tasks—like fetching water or helping set up tents. Be a team player.
By keeping these simple principles in mind, you’ll enhance your own experience and that of everyone around you.
Cost Breakdown and Value for Money
Average Guided Trek Price
Most guided treks to Bali Pass cost anywhere between ₹18,000 to ₹30,000 INR (roughly $220 to $360 USD) depending on the operator, duration, and inclusions. While it might feel steep, especially compared to budget DIY treks, here’s what that money really gets you:
-
Expert guides and local staff
-
Food and accommodation for up to 8 days
-
Permits and environmental fees
-
Medical support (including oxygen and first-aid)
-
Safety equipment and logistics
I compared multiple operators before booking, and believe me, the cheaper ones often skimp on safety or food quality. Go with someone who prioritizes experience over cost.
What Justifies the Cost
You’re not just paying for a service—you’re investing in safety, comfort, and access. Let’s break it down:
| Item | Included in Cost? | Estimated Value (INR) |
|---|---|---|
| Accommodation & Meals | ✅ | ₹6,000–₹10,000 |
| Transportation (local) | ✅ | ₹2,000–₹3,000 |
| Guides & Support Staff | ✅ | ₹4,000–₹6,000 |
| Medical & Safety Gear | ✅ | ₹3,000–₹5,000 |
| Permits/Entry Fees | ✅ | ₹1,000–₹1,500 |
The real value lies in the stress-free experience. You get to focus on the trek, the views, and the journey without sweating the logistics.
How to Stay Connected and Capture the Journey
Mobile Networks and Wi-Fi Access
Expect a digital detox. Once you leave Sankri, network coverage fades fast. A few spots near villages might catch a weak signal (BSNL or Jio), but don’t count on it.
That said, I found the lack of connectivity liberating. You engage more with the landscape, your fellow trekkers, and even your own thoughts. Just make sure to inform your loved ones that you’ll be off-grid for a few days.
Best Ways to Document the Trek
Even without live Instagram updates, you can still capture memories beautifully:
-
Carry a good-quality camera or a smartphone with decent battery life.
-
Use airplane mode to conserve power.
-
Journal your thoughts at the end of each day. Those raw feelings and details fade quickly.
-
If you’re into vlogging, a lightweight GoPro or action camera is ideal.
Once you’re back in network range, you’ll have a treasure trove of content to share—and more importantly, memories that don’t need Wi-Fi to be felt.
Alternatives to Bali Pass Trek
Similar Treks for Different Experience Levels
If you love the sound of Bali Pass but feel it’s a bit too intense (or maybe you’ve already done it), here are a few great alternatives:
-
Hampta Pass (Himachal): Easier but equally scenic, with dramatic changes in landscape.
-
Rupin Pass (Uttarakhand): More adventurous with similar alpine terrain.
-
Kuari Pass (Uttarakhand): Beginner-friendly with majestic views of Nanda Devi.
When to Consider These Instead
If you’re trekking in monsoon or winter, Bali Pass becomes inaccessible. In that case, Kuari Pass and Hampta are great options with shorter durations and safer trails. Also, if you’re short on time, look into weekend treks like Nag Tibba or Dayara Bugyal.
Final Thoughts Before You Go
What I Wish I Knew Before My First Trek
Honestly, I wish I had taken my pre-trek training more seriously. The altitude hit me harder than expected, and the first few days were tough. I also underestimated how cold it would get at night. No number of YouTube videos truly prepares you for sleeping under a frozen sky.
Pack light but wisely. Trust your guide. And bring an open heart. The Himalayas don’t just challenge your body—they stretch your soul.
One Last Bit of Advice
Don’t over-plan. The mountains have a way of surprising you—in the best ways. Leave space for the unexpected. Sometimes, it’s the unplanned tea break or the detour through a quiet meadow that stays with you the longest.
If you’ve read this far, you’re clearly serious about making this trek happen. So take that step. Book it, train for it, and let the journey unfold.
FAQs
How cold does it get on Bali Pass?
Temperatures can drop below -5°C at higher camps. At the summit, it can feel even colder with windchill. Proper layering is essential.
Can beginners do this trek?
It’s not recommended for absolute beginners. Prior experience on at least one high-altitude trek (12,000+ ft) is strongly advised.
Is a permit required?
Yes, permits are handled by the trekking company. You’ll need to submit ID proof and medical clearance.
What’s the highest altitude point?
The summit of Bali Pass stands at approximately 16,200 feet (4,940 meters).
Can I go solo without a guide?
Technically yes, but not advisable. The trail is remote, weather is unpredictable, and glacier crossings can be dangerous without proper equipment and knowledge