There are few maintenance tasks more satisfying or more cost-effective than changing your own engine oil. In an era where professional servicing costs continue to climb, the ability to perform this fundamental procedure in your own driveway represents not just a financial saving, but a reconnection with the mechanical heart of your vehicle.
The numbers tell a compelling story. With the average monthly cost of car ownership now exceeding $1,000 in many markets, and maintenance and repairs averaging $1,656 annually for the average driver , every opportunity to save matters. A professional oil change that might cost $80 to $120 at a dealership can be done at home for $30 to $50 in materials and the tools pay for themselves after just one or two services.
But beyond the economics lies something equally valuable: confidence. When you understand how to maintain your vehicle’s most critical system, you become a more empowered owner. You know what clean oil looks like, you recognize when something feels wrong, and you develop a relationship with your car that no service invoice can replicate.
The claim of a 10-minute oil change is ambitious but achievable provided you have the right preparation, the correct tools, and a vehicle you’re familiar with. The actual drain time for the oil will take longer than 10 minutes, but the hands-on mechanical work can absolutely be completed in that window. This guide walks you through every step, with detailed descriptions that serve as the next best thing to photographs, so you can tackle this job with confidence.
The Professional Alternative: When DIY Isn’t the Answer
Before we dive into the gratifying world of self-maintenance, it’s important to acknowledge that circumstances sometimes call for professional intervention. Perhaps you live in an apartment without driveway access, your schedule simply doesn’t permit a weekend project, or you’re driving a high-end European vehicle with particularly finicky service requirements. In these cases, seeking expert help isn’t defeat—it’s wisdom.
For UAE residents, particularly those in the northern emirates, the automotive service landscape offers exceptional options. A quick search for Car service Sharjah reveals a thriving ecosystem of professional workshops ready to handle everything from routine oil changes to complex mechanical work. Facilities like Burj Malabar Auto Maintenance on 13 Street #44 offer full synthetic oil changes for 299 AED with free pickup and delivery, two-year parts warranties, and same-day service—all at prices averaging 30% lower than dealerships .
For those with luxury vehicles, specialized workshops abound. AG Car Garage, operating since 1960, has expanded to nine branches across the UAE and offers engine oil changes starting from AED 250 using genuine parts . Usman Auto Repair Workshop specializes in high-end brands like Mercedes, BMW, and Porsche, while Auto Safe Garage provides ISO 9001 certified services including computer diagnostics . These facilities represent the professional backbone of the automotive ecosystem, ensuring that whether you DIY or delegate, your vehicle receives the care it deserves.
Before You Begin: Tools, Materials, and Preparation
The difference between a frustrating afternoon and a satisfying 10-minute job is preparation. Gather everything before you raise the vehicle, and the process flows smoothly.
Essential Tools and Materials
For the oil change itself:
-
Correct engine oil: Consult your owner’s manual for the exact viscosity (e.g., 5W-30, 0W-20) and capacity. Never guess—using the wrong oil can cause premature engine wear. A 1.0-liter engine may only need a couple of liters, while a 5.0-liter engine could require several gallons .
-
Correct oil filter: Again, consult your manual or an online parts database. The filter type is engine-specific and non-negotiable .
-
Drain pan: Minimum 10-quart capacity with a large opening to catch oil without spillage .
-
Socket set with correct drain plug size: Often 17mm or 8mm hex, but verify for your vehicle .
-
Oil filter wrench: 76mm, 14-flute wrenches are common, but filter sizes vary .
-
Torque wrench: Essential for proper tightening—drain plugs typically require 37 ft-lbs, filter housing cups around 19 ft-lbs .
-
Funnel: Makes refilling mess-free .
-
Disposable gloves: Engine oil contains harsh chemicals and carcinogens; avoid skin contact .
-
Shop towels: For cleanup and checking components .
For vehicle access:
-
Rhino Ramps or jack and axle stands: Never work under a vehicle supported only by a jack. Ramps cost around $40-60 and are a sound investment .
-
Wheel chocks: Place behind the wheels that remain on the ground .
For the conscientious mechanic:
-
Magnetic parts tray: Collects fasteners so nothing gets lost .
-
Head torch or work light: Visibility under the car is critical .
-
Recycling container: Old oil must be disposed of properly—never pour it down drains or into the ground .
Vehicle Preparation
-
Run the engine for 5-10 minutes to warm the oil. Warm oil flows more freely and drains more completely than cold oil. Don’t let it get too hot, though, or you risk burns .
-
Park on level ground and engage the parking brake firmly .
-
Raise the vehicle securely using ramps or jack stands. If using ramps, drive up slowly with a spotter guiding you, then chock the wheels .
The 10-Minute Oil Change: Step-by-Step
Step 1: Position Your Drain Pan and Remove the Drain Plug (2 minutes)
With the vehicle safely raised, slide underneath with your tools and drain pan. Locate the oil pan drain plug—it’s typically at the lowest point of the engine oil pan. Position your drain pan directly beneath it, allowing room for the oil to arc out as it drains .
Using the correct socket, break the drain plug loose with a counterclockwise turn, then switch to loosening by hand. As the plug comes free, oil will begin flowing immediately. Remove the plug quickly and cleanly, pulling it away from the oil stream. You can fish it out of the drain pan later .
Pro tip: If your vehicle has an undertray, you’ll need to remove it first. These are held by fasteners around the perimeter—collect them in your magnetic tray so nothing gets lost .
Step 2: Remove the Oil Filter (2 minutes)
While the oil drains, move your drain pan beneath the oil filter. Oil filters can be located in various places depending on your vehicle—consult your manual if you’re unsure .
Using your oil filter wrench, loosen the filter with a counterclockwise turn. Once it’s loose, you can often unscrew it by hand. Be prepared for additional oil to spill out when the filter breaks free—that’s why the pan is positioned beneath it .
Critical check: Once the filter is removed, verify that the old filter gasket came with it. A gasket that remains stuck to the engine will cause a massive leak when you install the new filter .
Step 3: Let the Oil Drain (Wait Time)
This is the one step you cannot rush. The oil may take 20-30 minutes to fully drain, particularly if it’s cold or the engine design has complex oil galleries . Use this time to:
-
Inspect the old drain plug and its gasket. Consider upgrading to a magnetic drain plug that captures metal particles—a worthwhile investment for engine longevity .
-
Compare the old and new oil filters. Cut open the old filter and inspect for metal shavings, which could indicate internal engine wear .
-
Prepare your new filter by applying a thin coat of fresh oil to the rubber gasket. This ensures a proper seal and prevents the gasket from sticking during your next oil change .
Step 4: Install the New Drain Plug and Filter (2 minutes)
Once oil flow has reduced to occasional drips, it’s time to button things up.
Drain plug installation:
-
Install a new drain plug gasket—never reuse the old one .
-
Hand-thread the drain plug into the oil pan to avoid cross-threading.
-
Using your torque wrench, tighten to manufacturer specification. For many vehicles, this is 37 ft-lbs . If you don’t have specifications, tighten securely but avoid force—stripped oil pan threads are a catastrophic and expensive repair.
Oil filter installation:
-
Wipe the filter mounting surface clean with a shop towel .
-
Hand-thread the new filter onto the mounting stud, turning clockwise.
-
Once the gasket makes contact, tighten an additional 3/4 to 1 full turn by hand. Do not use the filter wrench for installation—overtightening can damage the gasket and make future removal miserable .
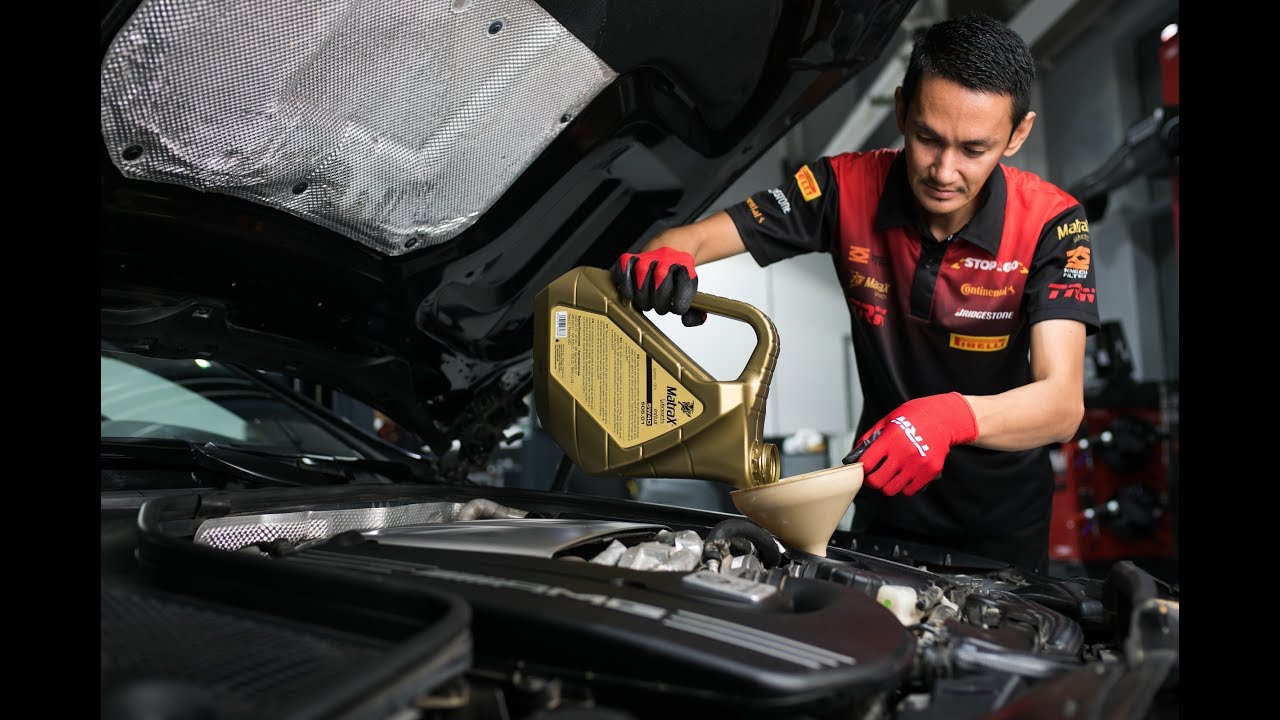
Step 5: Add Fresh Oil (2 minutes)
Move to the top of the engine and locate the oil filler cap. Remove it and insert your funnel .
Critical: Do not dump all the oil at once. Engines have specific capacities, and overfilling is as harmful as underfilling. Pour in most of the required amount—perhaps 80-90%—then wait a few minutes for the oil to settle into the pan .
Check the level using the dipstick:
-
Pull the dipstick, wipe it clean, reinsert fully, then remove again .
-
The oil level should be between the minimum and maximum marks.
-
Continue adding small amounts, waiting, and rechecking until the level is correct.
Pro tip: The distance between minimum and maximum marks on most dipsticks represents approximately 1 quart of oil .
Step 6: Leak Check and Cleanup (2 minutes)
Before lowering the vehicle, perform a thorough inspection:
-
Visually check the drain plug area for any signs of leakage.
-
Inspect around the oil filter.
-
Ensure the oil filler cap is securely fastened.
Start the engine and let it run for 30-60 seconds. This circulates the new oil and fills the new filter. While the engine runs, check underneath for any drips. Shut off the engine and wait 5 minutes for the oil to settle, then recheck the dipstick level one final time—it will likely have dropped as the filter filled, requiring a small top-up .
Replace the undertray if you removed it, lower the vehicle, and clean your workspace.
Step 7: Proper Oil Disposal
This step is non-negotiable. Used engine oil is hazardous waste. Never pour it on the ground, down storm drains, or into household trash .
Transfer the old oil from your drain pan into sealable containers—empty oil bottles work perfectly. Most auto parts stores accept used oil for recycling at no charge. Some municipalities have designated hazardous waste collection centers. Do the right thing.
Tips for Achieving the 10-Minute Goal
The steps above describe the complete process, but achieving the 10-minute hands-on timeframe requires optimization:
Preparation is everything. Lay out all tools before raising the car. Have your new oil open, your funnel ready, and your drain pan positioned .
Warm up the engine beforehand. Cold oil drains slowly; warm oil flows quickly .
Know your vehicle. If this is your first oil change on a particular car, research specifics beforehand—drain plug location, filter type, capacity, and any quirks. Forums dedicated to your vehicle model are invaluable resources .
Use the right tools. A proper oil filter wrench and correctly sized socket make the difference between smooth removal and stripped fasteners .
Work systematically. Once you’ve done this procedure two or three times, it becomes muscle memory. Experienced DIYers genuinely can complete the mechanical work in 10 minutes, though the drain time itself remains beyond their control.
When to Seek Professional Help
As satisfying as DIY maintenance is, it’s not for everyone or every situation. Consider professional service if:
-
You lack safe workspace: A sloped driveway or street parking makes proper jacking impossible.
-
Your vehicle has special requirements: Some European cars have cartridge-style filters in difficult locations or require specialized tools.
-
You’re uncomfortable: There’s no shame in acknowledging that this isn’t your skill set. Proper maintenance, regardless of who performs it, is what matters.
In Sharjah, the professional options are excellent. Beyond the previously mentioned garages, AutoPro Car Care Professionals operates 42 locations across the UAE with services including oil changes, brake repairs, and emission testing . Babil Car Maintenance & Service Station in Industrial Area 5 offers competitive oil change rates with positive customer reviews for efficient service .
Conclusion: The Confidence of Self-Sufficiency
Changing your own oil is simultaneously one of the simplest and most rewarding automotive maintenance tasks. It saves money, ensures the job is done right, and builds a connection with your vehicle that no amount of dealership service can replicate. The first time you complete it successfully, you’ll wonder why you ever paid someone else to do something so straightforward.
The 10-minute oil change is an achievable goal—not in total elapsed time, which includes necessary drain periods, but in the hands-on mechanical work. With practice, preparation, and the right tools, you can absolutely complete the active portions of this job in under 10 minutes.
Whether you choose the DIY path or opt for professional service, the important thing is regular maintenance. Clean oil is the lifeblood of your engine, and attending to it faithfully is the single most important factor in extending your vehicle’s life. So gather your tools, consult your manual, and give it a try. Your car—and your wallet—will thank you.