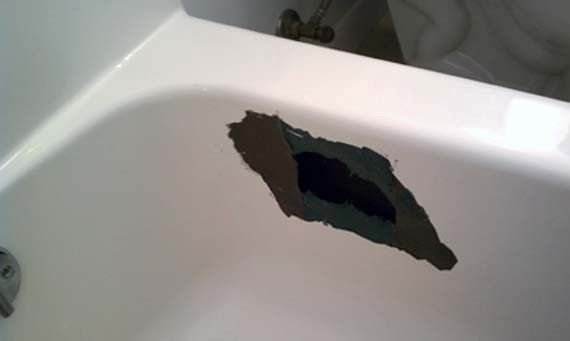
A hole in your fibreglass bathtub can be alarming. Even a small puncture can allow water to seep beneath the tub, leading to mould, rot, and expensive structural damage if left untreated. The good news is that replacing the entire bathtub is rarely necessary. With the right repair method and a professional-grade repair kit, most holes in tubs can be repaired at home with results that are both strong and nearly invisible.
Why Do Fibreglass Tubs Develop Holes?
Fibreglass is one of the most popular bathtub materials because it’s lightweight, affordable, and easy to install. However, unlike cast iron or steel, it can crack or puncture if it’s subjected to enough force.
Common causes include:
- Dropping heavy tools or objects into the tub
- Poor support beneath the bathtub that causes flexing
- Ageing fibreglass that has become brittle over time
- Previous repairs that failed
- Damage during remodelling or installation
The size and location of the hole will determine which repair method works best.
Can You Repair a Hole in a Fibreglass Tub?
Yes. In most cases, a fibreglass hole can be permanently repaired without replacing the tub.
Small chips and cosmetic damage usually require only filler and refinishing. Larger holes require rebuilding the damaged section with fibreglass reinforcement before restoring the surface finish.
If the hole is located on the side wall of the tub, the repair is generally straightforward. However, if the damage is on the bottom where people stand, the repair must restore the tub’s structural strength to prevent future flexing and cracking.
The key is using a repair kit that’s designed for the type of damage you’re fixing, not a one-size-fits-all epoxy.
What You’ll Need
Before you begin, gather the proper materials:
- Sandpaper in multiple grits
- Acetone or surface cleaner
- Mixing board and applicators
- Fibreglass reinforcement materials
- Body filler or repair compound
- Color-matching pigments
- Protective gloves and eye protection
- A professional fibreglass tub repair kit
Using high-quality repair materials makes a significant difference in both the strength and appearance of the finished repair.
Step 1: Inspect the Damage
Begin by carefully examining the hole.
Determine whether the surrounding fibreglass is solid or if additional cracks extend beyond the visible damage. Press gently around the area. If the tub flexes significantly, additional reinforcement may be necessary before cosmetic repairs begin.
Also inspect underneath the tub, if accessible, for signs of water damage.
Step 2: Clean the Area
Remove soap residue, oils, loose fibreglass, dirt, and any previous repair material.
A clean surface allows the repair materials to bond properly.
After cleaning, allow the area to dry completely before continuing.
Step 3: Prepare the Hole
Sand around the damaged area to remove the glossy gel coat and expose fresh fiberglass.
Trim away loose or broken fibreglass around the hole until only solid material remains.
Creating a properly prepared surface is one of the most important factors in achieving a long-lasting repair.
Step 4: Rebuild the Damaged Area
This is where many DIY repairs fail.
Simply filling a large hole with epoxy is usually not enough. The damaged section should first be reinforced with fiberglass materials that restore the original strength of the tub.
For larger holes on bathtub walls, the Large Wall Damage Tub Repair Kit includes the fibreglass reinforcement, fillers, finishing materials, and colour-matching supplies needed to rebuild damaged sections of fibreglass tubs and showers.
If the hole is located on the floor of the bathtub where weight is applied every day, you’ll need the Floor Crack Repair, which is specifically designed to reinforce weight-bearing repairs and reduce future flexing.
Allow the reinforcement to cure completely before moving on to the finishing steps.
Step 5: Sand the Repair Smooth
Once cured, sand the repaired area gradually using finer grits until the repair blends smoothly into the surrounding bathtub surface.
Avoid rushing this step.
Professional-looking repairs are achieved through careful shaping and sanding, not by applying excessive finish coating.
Step 6: Match the Colour
A repair is only complete if it blends with the rest of the bathtub.
Professional repair kits include color-matching pigments that allow you to closely match common bathtub colors rather than relying on a generic white.
Step 7: Apply the Finish Coat
Apply the finish coat evenly over the repaired area.
This restores the glossy factory appearance while protecting the repair from water and daily use.
Allow the recommended curing time before using the bathtub. Although the repair itself may only take a few hours, waiting a full day before exposing it to water helps ensure maximum durability.
Common Mistakes to Avoid
Many bathtub repairs fail because of avoidable mistakes rather than poor materials.
Using automotive body filler without fibreglass reinforcement, skipping surface preparation, applying finish over uncured filler, or using cosmetic repair kits on structural damage often results in peeling, cracking, or recurring holes.
Taking the time to follow each step carefully will produce a much stronger and longer-lasting repair.
When Should You Replace the Tub Instead?
While most isolated holes can be repaired successfully, replacement may be the better option if:
- The bathtub has multiple structural cracks.
- The surrounding fibreglass is soft or deteriorated.
- Water damage has affected the framing beneath the tub.
- The tub has been repaired several times previously and continues to fail.
In these situations, replacing the bathtub may be more cost-effective in the long run.
Final Thoughts
Repairing a hole in a fibreglass tub is often much easier and more affordable than replacing the entire bathtub. By using the correct repair method and high-quality materials, you can restore both the strength and appearance of your tub while avoiding costly demolition.